
Side Dishes
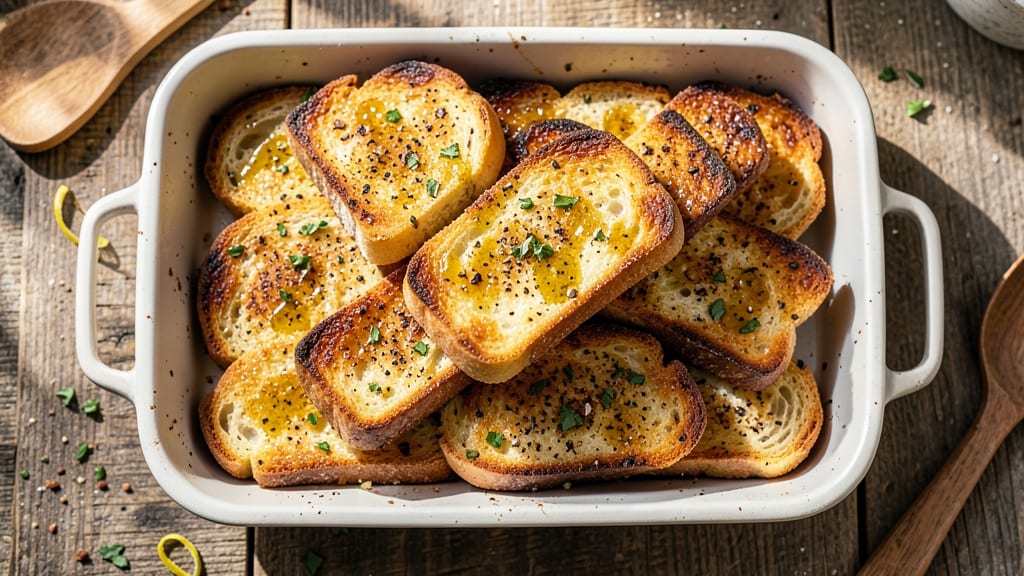
This air fried bread recipe transforms ordinary loaves into crispy-gold bites that rival bakery-fresh perfection in just 15 minutes. The secret lies in high-heat air frying—no deep-frying mess or hours of baking required.
I developed this method after struggling with soggy bread from other quick-cooking techniques, and it finally delivers that satisfying crunch without compromising texture.
The process is surprisingly simple: slice your bread thinly (homemade or store-bought works), coat lightly in oil, and let the air fryer work its magic at 375°F. The key to avoiding dryness?
A quick spray of water before frying creates steam that keeps the interior tender while the exterior achieves that coveted golden-brown finish. This technique works with any bread type—sourdough, baguettes, or even dinner rolls.
What you'll end up with is bread that's crispy enough to stand up to dipping while remaining soft inside, perfect for garlic butter, marinara, or even as a crunchy topping for soups.
The air fryer's even heat distribution ensures every slice turns out perfectly, eliminating the guesswork of traditional frying methods. No more soggy bread—just restaurant-quality crunch in minutes.
This method also scales effortlessly—double the batch for parties or meal prep. The beauty of air frying is its versatility: you can experiment with seasonings like smoked paprika or Italian herbs for added flavor depth.
Once you try this, your bread game will never be the same. Let's get started with the foolproof technique.
Ingredients for air fried bread
Eight simple ingredients transform ordinary bread into crispy-gold bites in minutes—no deep fryer needed.
| Ingredient | Amount | Notes |
|---|---|---|
| Fresh Baguette or Sourdough Bread 🍞 | 1 whole | Stale or day-old preferred for crispiness |
| Extra-Virgin Olive Oil 🫒 | 2 tbsp | Light coating for crisping |
| Water 💧 | 1 tbsp | Mist for steam and tenderness |
| Garlic Powder 🧄 | 1 tsp | Optional for flavor depth |
| Smoked Paprika 🌶️ | ½ tsp | For smoky aroma (optional) |
| Italian Seasoning 🍃 | ½ tsp | Or dried oregano and basil |
| Salt 🧂 | ½ tsp | Diamond Crystal preferred |
| Black Pepper 🌶️ | ¼ tsp | Freshly cracked for flavor |
The bread is everything here. Day-old baguettes or sourdough work best—they're sturdier and crisp up perfectly. Trader Joe's has great pre-sliced options if you're short on time, but homemade loaves taste even better. Look for bread with a tight crumb structure; it holds up better to the high heat. If you're using a fresh loaf, slice it thinly (about 1/4-inch thick) for even cooking. Pro tip: Freeze the slices for 20 minutes before air frying—the cold start helps lock in moisture for that tender interior.
No olive oil? Avocado oil or melted butter works just as well—just don't skip it. The water spray is non-negotiable for that bakery-fresh steam. Short on smoked paprika? Regular paprika plus a pinch of cayenne gives similar depth. Italian seasoning? Mix equal parts dried basil, oregano, and thyme if you're missing one. The seasonings are totally optional, but they elevate the flavor from 'crispy' to 'restaurant-quality.' And if you're feeling fancy, toss the bread in grated Parmesan after frying for a cheesy twist.
This bread stays crispy for about 30 minutes at room temperature—perfect for serving immediately. For longer storage, keep in an airtight container with a paper towel to absorb moisture. Re-crisp in the air fryer for 2-3 minutes at 375°F if it softens. Freezes beautifully for up to 3 months—just thaw and re-crisp before serving. Double the batch and freeze half; you'll thank yourself later when you're craving crispy bread with zero effort.
Why You'll Love This Recipe
- No-Fuss Crispiness: I swear by this trick—just toss bread slices in olive oil, a pinch of garlic powder, and smoked paprika, then air-fry for 5 minutes. No flipping, no fuss, just that perfect golden crust every time.
- Garlicky Magic: That smoky paprika and garlic powder combo? It’s like a warm hug for your taste buds. The bread soaks up the flavor without tasting heavy—just rich, savory, and impossible to resist.
- Game for Any Meal: Between us, I use this for breakfast (with butter and jam), as a side for dinner (with garlic aioli), or even as a snack when I’m craving something crunchy. It’s the ultimate blank canvas.
- Budget Crunch: Old bread? No problem. A few slices of day-old baguette or sourdough get a second life here, and the ingredients cost pennies. I’ve made a whole loaf disappear in one sitting—no waste, all flavor.
Step-by-step instructions for air fried bread recipe
Here's how to transform stale bread into crispy, golden bites—no oven needed.
Prep the Bread for Maximum Crispiness
Slice the whole fresh baguette or sourdough bread into ½-inch thick pieces—about 16-20 slices total for 4 servings. I like to cut each piece into 2-inch long rectangles for even cooking. If using day-old bread, skip this step and work with the whole loaf, cutting after preheating.
Place the bread slices on a wire rack set over a baking sheet. This allows air to circulate on all sides, preventing soggy centers. If you're short on time, you can skip the rack and use the air fryer basket directly, but you'll need to flip more frequently for even browning.
Season and Lightly Coat the Bread
In a small bowl, whisk together the 2 tablespoons extra-virgin olive oil, 1 tablespoon water, 1 teaspoon garlic powder, ½ teaspoon smoked paprika, ½ teaspoon Italian seasoning, ½ teaspoon salt, and ¼ teaspoon black pepper. This mixture is your flavor base—don't skimp on the seasoning, especially if you're using plain bread.
Use a pastry brush to lightly coat both sides of each bread slice with the oil mixture. You want just enough to create a light sheen, not a pool of oil. The water in the mix helps create steam during cooking, keeping the interior tender while the exterior crisps. Work in batches if needed to avoid overcrowding.
Preheat the Air Fryer to High Heat
Set your air fryer to 375°F and let it preheat for 3-5 minutes. This high temperature is crucial for achieving that perfect balance of crispy exterior and soft interior. While it's heating, arrange the seasoned bread slices in a single layer in the air fryer basket, leaving about ½ inch of space between each piece. Overcrowding will lead to uneven cooking.
I always give the basket a gentle shake after preheating to ensure even heat distribution. This step is non-negotiable—skipping it can result in some pieces cooking faster than others. The air fryer should be hot enough that a drop of water sprinkled on the basket sizzles immediately when it hits.
Cook in Batches for Perfect Crisp
Cook the bread slices for 4-5 minutes per batch, flipping them halfway through for even browning. You're looking for deep golden brown color with crisp edges—this is your target. The bread should be firm to the touch but still soft inside. If using a whole loaf, cut it into ½-inch thick slices after preheating and cook for 6-8 minutes, flipping once.
Here's the thing—don't walk away during this step. Air fryers vary in power, and you might need to adjust time based on your model. If the bread starts to brown too quickly, reduce the temperature to 350°F for the next batch. The goal is crispy, not burnt. You'll know it's perfect when it releases easily from the basket with minimal sticking.
Serve Immediately for Maximum Crunch
Transfer the crispy bread to a wire rack or paper towel-lined plate to cool for just 1-2 minutes. This brief rest prevents the bread from becoming soggy from residual steam. Serve immediately while still warm—crispy bread loses its texture within minutes as it cools. For extra flair, sprinkle with additional Italian seasoning or a pinch of smoked paprika right before serving.
These crispy bites make a fantastic appetizer, side dish, or even a base for dips like garlic aioli or marinara. The key to success is that high heat and the water in the seasoning mixture—together they create the perfect texture contrast. Store any leftovers in an airtight container for up to 2 days, but honestly, they won't last that long!
Pro Tips For Making Air Fried Bread
- CUT BREAD LENGTHWISE: Slice the baguette or sourdough into 1-inch thick pieces before air frying—thinner slices crisp faster, but these chunks stay sturdy enough to hold up to dipping. I used to fry whole slices and ended up with uneven cooking; this method guarantees a perfect golden crust every time.
- BRUSH OIL TWICE: Douse the bread in olive oil once, let it sit for 10 seconds, then brush it on again—this ensures the oil penetrates the crust instead of pooling. My first attempts left some slices dry because I skipped the second coat, and trust me, you’ll taste the difference.
- AVOID OVERCROWDING: Leave at least ½ inch of space between bread pieces in the air fryer basket—otherwise, they’ll steam instead of crisp. I learned this after a batch came out soggy; now I rearrange them once mid-cook if needed.
- USE A MIST SPRAY: Lightly mist the bread with water after oiling—this creates steam that helps the paprika and garlic powder cling better. Sounds counterintuitive, but it makes the seasoning stick like glue, and the bread stays crispy longer. (Yes, even if you’re impatient like me.)
Storing and reheating this air fried bread
Room-Temp Storage
Your air-fried bread stays perfectly crispy for about 30 minutes at room temperature—ideal for serving immediately. To extend this window, place the cooled bread in an airtight container with a paper towel to absorb moisture. I like using Rubbermaid Brilliance containers because they seal tightly.
Store the bread upright if possible, as stacking can cause compression and softness. For extra insurance, sprinkle a tiny pinch of salt on the paper towel—it helps absorb moisture even better. 💫
Fridge Preservation
If you have leftovers (unlikely, but possible!), refrigerate them in the same airtight container for up to 2 days. The bread will lose some crispness but remains edible.
To revive it, simply pop the slices back in the air fryer at 375°F for 2-3 minutes until golden and crisp again. I recommend reheating in batches to avoid overcrowding. For best results, don't store the bread with any dips or toppings—condensation will make it soggy. 🥖
Freezer Magic
Freezing is where air-fried bread truly shines—it stays crispy for up to 3 months with minimal effort. Place slices in a single layer on a tray and freeze until solid, then transfer to a freezer bag with all air squeezed out.
When ready to eat, thaw at room temperature for 10 minutes, then reheat in the air fryer at 375°F for 3-4 minutes. Pro tip: Freeze the bread after air frying but before adding any toppings. This method preserves texture perfectly—no microwave required! ❄️
Reheating Secrets
Never reheat air-fried bread in the microwave—it turns rubbery and sad. Instead, use the air fryer for that perfect crunch. For a stovetop option, heat a dry skillet over medium heat for 30 seconds, then add the bread and cook for 1-2 minutes per side until golden.
The key is speed—don't let it sit too long in the pan. If you're reheating multiple batches, adjust the temperature downward to 350°F to prevent burning. A light spray of water before reheating can help restore that bakery-fresh steam. 🔥
Batch Prep Tips
Make this a meal-prep staple by doubling the recipe and freezing half. I like to portion the bread into quart-sized freezer bags with parchment paper between layers to prevent sticking. Label each bag with the date and reheating instructions.
For parties, arrange the cooled bread on a wooden serving board with small bowls of dips—it looks stunning and keeps the bread crispy longer. The secret to large batches is patience: air fry in two batches if needed, but never overcrowd the basket.
This ensures every piece gets that perfect golden-brown finish. 💡
Nutrition facts
Frequently asked questions
Can I use any type of bread with this air fryer method?
This technique works best with sturdier breads like baguettes, sourdough, or Italian bread that hold up to high heat. For softer breads like brioche, reduce the temperature to 350°F and cook for 3-4 minutes to prevent burning. Avoid very delicate breads—they may fall apart during frying.
Why does my air-fried bread turn out soggy?
Sogginess usually happens from two things: overcrowding in the air fryer or not enough oil. Always leave ½-inch between slices and use just enough oil to lightly coat. The water spray creates steam, but too much moisture without proper airflow causes condensation. Cook in batches if needed!
Do I need to preheat the air fryer for this recipe?
Yes! Preheating for 3-5 minutes at 375°F ensures even cooking and that perfect golden-brown crust. Skipping this step can lead to uneven browning and longer cook times. A quick test: sprinkle a drop of water on the basket after preheating—it should sizzle immediately.
Can I make this bread ahead of time?
Yes, but with one key trick: freeze the bread after air frying but before adding toppings. It stays crispy for up to 3 months. To serve, reheat at 375°F for 3-4 minutes. For room-temperature storage, keep in an airtight container with a paper towel for up to 2 days.
What's the best way to season air-fried bread?
Start with the basic mix of olive oil, garlic powder, and salt, then get creative! Try smoked paprika + cayenne for heat, Italian seasoning + Parmesan for Italian flair, or even cinnamon sugar for a sweet twist. The key is to coat lightly—too much seasoning can make the bread taste salty or dry.