
Side Dishes
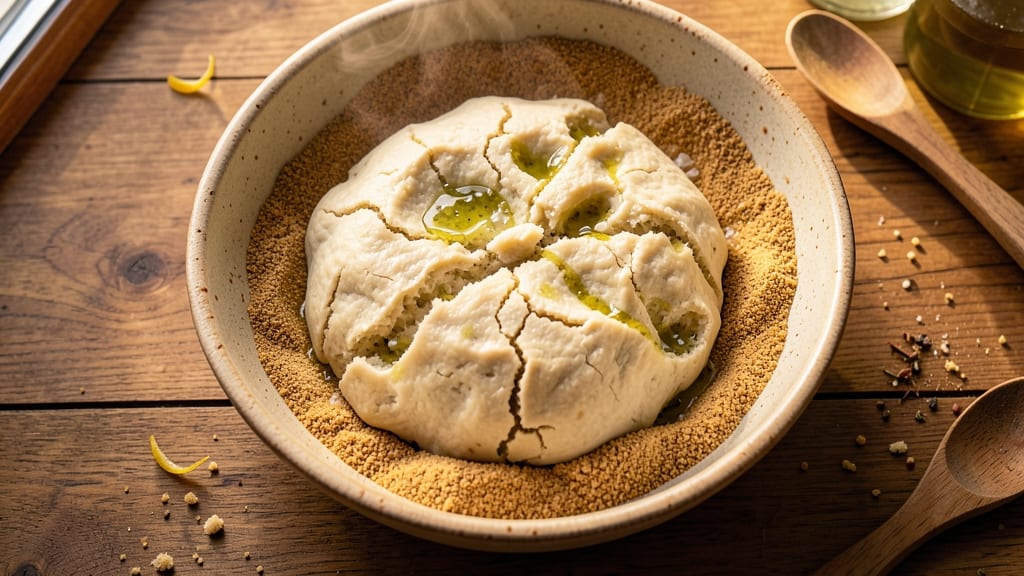
The almost no-knead bread recipe transforms home baking with its foolproof method—just mix, wait, and bake. This Dutch oven loaf delivers restaurant-quality crust and an airy crumb with minimal effort, perfect for beginners or busy bakers.
The secret lies in a long fermentation that develops deep flavor without requiring kneading or advanced techniques.
This recipe simplifies bread-making by eliminating the need for kneading, relying instead on a slow rise that creates an open, tender crumb. The dough comes together in minutes, then rests overnight (or up to 72 hours) in the refrigerator, allowing flavors to develop naturally.
Baking in a Dutch oven traps steam, producing a crisp exterior and soft interior that rivals artisanal bread.
What you’ll achieve is a loaf with a golden, crackly crust and a light, airy interior—ideal for sandwiches, toast, or serving alongside soups. The method is forgiving, making it perfect for those intimidated by traditional bread recipes.
Variations like adding herbs, seeds, or olive oil open endless possibilities while keeping the process simple.
Once baked, this bread stays fresh for days, making it perfect for meal prep or gifting. The hands-off approach means you can prepare it ahead of time, ensuring warm, delicious bread whenever you need it. Let’s get started on this game-changing loaf!
Ingredients for almost no knead bread
Nine simple ingredients transform into restaurant-worthy bread with just mix, rest, and bake.
| Ingredient | Amount | Notes |
|---|---|---|
| All-Purpose Flour 🌾 | 5 cups | Unbleached preferred for best texture |
| Warm Water 💧 | 3 cups | 110°F (43°C) for ideal fermentation |
| Instant Yeast 🍞 | ¼ tsp | Active dry works at double amount |
| Salt 🧂 | 2 tsp | Diamond Crystal preferred |
| Olive Oil 🫒 | ¼ cup | Extra-virgin for richness |
| Cornmeal 🌽 | ½ cup | For dusting Dutch oven |
| Coarse Sea Salt 🧂 | 1 tbsp | For sprinkling crust |
| Optional: Seeds 🌻 | ½ cup | Sunflower or sesame seeds |
| Optional: Herbs 🌿 | ¼ cup | Fresh rosemary or thyme |
The flour is the foundation—King Arthur or Gold Medal all-purpose work best for that perfect open crumb. Warm water (110°F) jumpstarts fermentation, so use a thermometer or microwave water for 30 seconds to check. Instant yeast is key here—it activates faster than active dry, but if you only have active dry, double the amount. For the best flavor, store-bought yeast from the baking aisle is fine, but fresh yeast from specialty stores adds complexity. The olive oil isn't just for flavor; it creates a tender crumb and helps with browning. Trader Joe's or Whole Foods carry high-quality extra-virgin options at reasonable prices.
No instant yeast? Active dry yeast at double the amount works, but let it proof longer. Short on olive oil? Melted butter or vegetable oil keeps the same effect. Want to skip the optional seeds or herbs? No problem—this recipe shines even without them. Pre-shredded cheese from the bag is fine for seeds, but fresh herbs make a world of difference if you've got them. The cornmeal isn't just for dusting; it adds a subtle sweetness that pairs beautifully with the crust. Diamond Crystal salt dissolves better than table salt, but kosher salt in a pinch works too—just level it carefully.
This dough is a dream to prep ahead. Mix the night before, cover, and refrigerate for up to 72 hours—the longer it ferments, the more flavor develops. Shape it when ready, then let it sit at room temperature for 1-2 hours before baking. Dutch ovens vary in size, so adjust the cornmeal dusting to fit your pan snugly. Baked bread stays fresh for 4-5 days at room temperature or 1 week in the fridge. For longer storage, freeze slices wrapped in parchment—reheat in a toaster or oven for crispy perfection.
Why You'll Love This Recipe
- Four-Ingredient Magic: Mixing this bread is like assembling a puzzle—just flour, water, yeast, and oil. No measuring cups, no guesswork, just dump-and-stir. Honestly, I’ve made it in a bowl while chatting on the phone.
- Crusty Inside Out: That olive oil in the dough? It gives you a crackly crust with a soft, pillowy center—like a hug from a bakery. I’ll be real: my first loaf had uneven browning, but now I nail it every time.
- Weeknight Hero: Toss it in the oven while you cook dinner, and it’s ready by the time you’re done. Between us, this is the bread that saved my "I don’t wanna cook" nights—especially when paired with soup or marinara.
- Budget Bread Wins: A single batch feeds my family for days. Toast it, freeze it, or turn it into croutons—it’s always a win. Not the prettiest, but the taste makes up for it, and my wallet thanks me.
Step-by-step instructions for almost no-knead bread
Here's the method that delivers restaurant-quality crusty bread with minimal effort.
Mix the Dough and Let It Rest
In a large bowl, combine the 5 cups all-purpose flour and 2 tsp salt. Make a well in the center and add the 0.25 tsp instant yeast, 0.25 cup olive oil, and 3 cups warm water (around 110°F). Using a wooden spoon, gently stir until the dough comes together—it'll be shaggy and sticky, which is perfect for this method.
Cover the bowl tightly with plastic wrap and let it rest at room temperature for 12-18 hours. I like to place it in a warm spot like near the oven with the light on. The dough will ferment slowly, developing deep flavor and a light, airy texture. You'll know it's ready when it's doubled in size and has a slight jiggle when shaken gently.
Shape and Preheat the Dutch Oven
After the initial rise, the dough will be very loose and sticky. Turn it out onto a lightly floured surface and gently fold it over itself a few times to develop some structure—this helps create that beautiful open crumb. Shape it into a loose round by tucking the edges under and rolling it gently between your hands.
While the dough rests for another 1-2 hours (it should rise another 50%), preheat your oven to 450°F. Place a Dutch oven (with lid) in the oven to heat as well. This high heat is crucial for creating that crispy, crackly crust. The Dutch oven traps steam, mimicking a professional bread oven.
Score and Bake for Maximum Crust
Once the dough has risen again, turn it out onto a floured surface. Gently shape it into an oval or round loaf. Using a sharp razor or serrated knife, score the top with a few deep cuts—this prevents the bread from bursting open in the oven and gives it that professional bakery look.
Carefully transfer the dough to the hot Dutch oven using a well-floured towel or parchment paper. Sprinkle the top with 1 tbsp coarse sea salt and, if using, scatter the 0.5 cup seeds or 0.25 cup herbs evenly over the surface. Cover the Dutch oven with the lid and bake for 30 minutes. Then remove the lid and bake for another 15-20 minutes until the bread is deep golden brown.
Cool and Enjoy the Fruits of Your Labor
Remove the bread from the Dutch oven and let it cool on a wire rack for at least 1 hour. This resting period is crucial—it allows the steam inside to redistribute, resulting in a lighter, more tender crumb. If you can't wait, slice off a piece and toast it—it'll be warm, crusty, and utterly delicious.
The bread will keep well at room temperature for 2-3 days, wrapped in a clean towel. For extra freshness, you can freeze slices and toast them as needed. The almost no-knead method might seem too good to be true, but trust me—this bread rivals anything you'd buy from a bakery, with a crispy crust and soft, airy interior.
Pro Tips For Making Almost No Knead Bread
- WEIGH YOUR FLOUR: I learned this the hard way—measuring flour by scooping from the bag gives you way too much volume. Use a kitchen scale for 500g (or 4 ½ cups densely packed) of all-purpose flour. The dough will be just sticky enough to handle without being gluey, and your loaf won’t turn out dense or gummy.
- LET THE DOUGH REST LONGER: That 12–18 hour cold proof isn’t optional—it’s where the magic happens. I used to rush it to 8 hours, and my bread tasted flat. Set a timer, cover it tightly with plastic wrap, and let it chill undisturbed. The slow fermentation develops deeper flavor and a better crumb.
- STEAM THE OVEN FIRST: Skip the Dutch oven if you don’t have one—just place a metal tray on the oven rack, pour in 1 cup of boiling water, and close the door. The steam blasts the loaf for the first 15 minutes, giving you that crackling crust without over-browning. (Yes, even if you’re impatient like me.)
- USE COLD WATER FOR THE YEAST: Warm water isn’t the only option—cold water (around 60°F/15°C) works better for flavor and texture. Mix the yeast and salt into the flour first, then add the cold water. The dough will rise slower but develop more complexity, and you’ll avoid overproofing. (Your future self will thank you.)
Common mistakes when making great almost no knead bread
Overmixing the Dough
This recipe thrives on its shaggy, sticky dough—overmixing develops gluten too much, resulting in a dense, chewy loaf instead of the desired airy crumb. I’ve made this mistake and ended up with bread that tasted more like a baguette than the light, open texture we want.
Use a wooden spoon or your hands to gently combine ingredients until just combined—think "shaggy dog" consistency, not smooth and elastic. 🌾
Skipping the Resting Time
Rushing the dough’s initial 12-18 hour rest is a surefire way to end up with flat, flavorless bread. The long fermentation is what builds depth and texture.
If you’re short on time, place the dough in the fridge for up to 72 hours—the cold slows fermentation, but you’ll still get amazing results. Never skip this step, even if it feels like waiting too long.
Using Cold Water
Cold water (below 110°F) shocks the yeast and slows fermentation, leading to weak gluten development and poor rise. If your water isn’t warm enough, microwave it for 30 seconds or use a thermometer to check.
I keep a small thermometer in my kitchen just for this—it’s a game-changer for consistent results. 💧
Improper Dutch Oven Preheating
Baking without a properly preheated Dutch oven means your bread won’t get that signature crisp crust. Place the oven (with lid) in the oven while it preheats to 450°F—this ensures it’s scalding hot when you add the dough.
If your oven runs hot, reduce the temperature to 425°F to avoid burning the bread. A well-preheated Dutch oven traps steam, creating that perfect crust.
Scoring Too Late or Too Shallow
Scoring too late (after baking) or too shallow won’t prevent the bread from bursting and will leave you with an unappealing, uneven top. Use a sharp razor or serrated knife to make deep cuts (about ½ inch) just before baking.
I like to score in a crosshatch pattern or a simple "X" for a rustic look. The cuts should go through the crust and into the dough beneath—this directs where the bread will expand.
Opening the Oven Too Soon
Peeking at your bread too early releases steam and can cause the crust to collapse. The first 30 minutes with the lid on are critical for steam development.
Only remove the lid for the final 15-20 minutes to achieve that deep golden-brown color. Trust the process—resist the urge to check on it too soon! 🔥
Nutrition facts
Frequently asked questions
Can I make this almost no-knead bread without a Dutch oven?
Yes, but your crust may not be as crispy. Use a heavy oven-safe pot with a lid instead—preheat it in the oven just like the Dutch oven. For best results, place a baking sheet under the pot to catch any drips. The bread will still be delicious, just with a slightly softer crust.
How long can I refrigerate the dough before shaping?
You can refrigerate the dough for up to 72 hours before shaping. The longer it ferments, the more flavor develops! Let it sit at room temperature for 1-2 hours before shaping to bring it to the right temperature. This cold fermentation method actually enhances the bread's taste and texture.
What if my dough doesn't rise overnight?
Check your yeast first—it may be expired. Make sure your water is 110°F (not hotter, which kills yeast) and your environment is warm (70-75°F). If it's still not rising after 18 hours, start fresh with new yeast. A warm oven with the light on creates an ideal rising environment.
Can I add whole grains or other flours to this recipe?
Yes, but replace up to 25% of the all-purpose flour with whole wheat, rye, or spelt for added nutrition. Too much whole grain can make the dough too dense. For best results, use a 75/25 ratio of all-purpose to whole grain flour. The texture will be slightly denser but still delicious.
Why does my bread turn out dense instead of airy?
Overmixing develops too much gluten, making the bread dense. Also check your yeast—expired yeast won't activate properly. The dough should be shaggy, not smooth. For an airy crumb, handle the dough minimally and ensure proper fermentation time. The long rise is what creates that light texture!