
Side Dishes
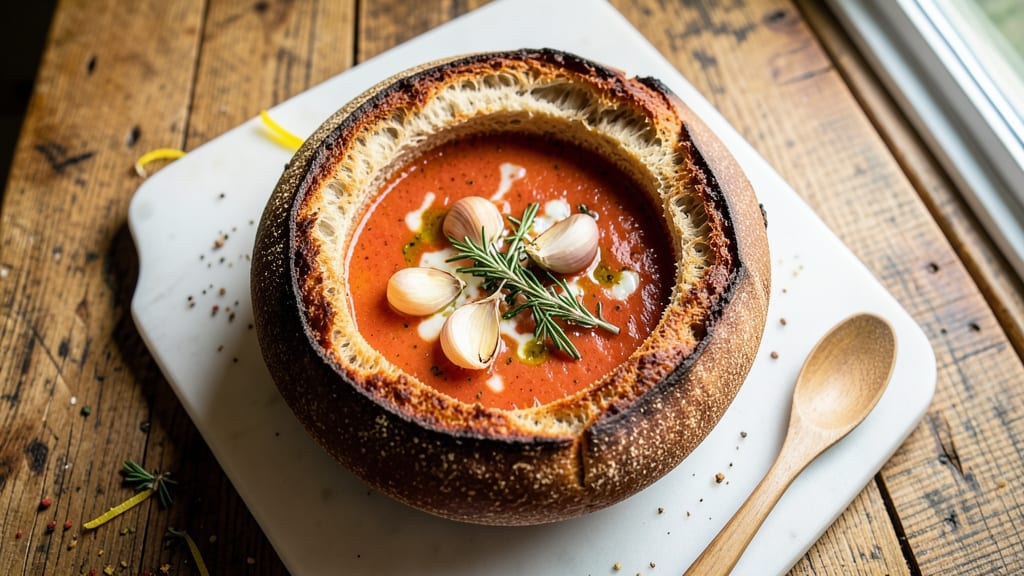
Transforming an artisan bread bowl into a sturdy, edible vessel is a game-changer for serving soups and salads. This recipe delivers a crispy, flavorful bowl that holds up to even the heartiest fillings.
The key lies in selecting the right dough and mastering the hollowing technique—no special equipment required, just patience and precision.
Start with a well-proven dough, like a classic sourdough or Italian bread, baked until golden and sturdy. The hollowing process creates a hollow center that can hold up to 2 cups of soup or salad without collapsing.
A sharp knife and steady hand ensure clean cuts, while a final broil in the oven adds that perfect crispness to the edges.
What you’ll end up with is a bowl that’s not just functional but delicious—crusty on the outside, soft and chewy on the inside, and infused with the warm, comforting flavors of freshly baked bread.
The best part? It’s edible, so every bite is part of the meal. Perfect for cozy dinners, potlucks, or impressing guests with a unique presentation.
Pair your bread bowl with creamy tomato soup, chilled gazpacho, or even a hearty chili for a meal that’s as satisfying as it is visually stunning. The possibilities are endless, and the technique is simpler than it seems. Let’s get started on creating your edible masterpiece.
Ingredients for artisan bread bowl
The perfect dough, a few simple ingredients, and patience create an edible masterpiece.
| Ingredient | Amount | Notes |
|---|---|---|
| Sourdough Dough 🍞 | 2 lb | Homemade or store-bought, well-proven |
| Extra-Virgin Olive Oil 🫒 | 2 tbsp | For brushing dough before baking |
| Coarse Sea Salt 🧂 | 1 tsp | Diamond Crystal preferred |
| Garlic Cloves 🧄 | 4 cloves | Minced for filling |
| Fresh Rosemary 🌿 | ¼ cup | Chopped, for flavor infusion |
| Creamy Tomato Soup 🍅 | 2 cups | For filling (homemade or quality store-bought) |
| Shredded Parmesan Cheese 🧀 | ¼ cup | Freshly grated for garnish |
| Fresh Basil Leaves 🌿 | ⅛ cup | Chopped, for garnish |
| Black Peppercorns 🌶️ | ½ tsp | Freshly cracked for finishing |
| Sharp Knife ✂️ | 1 whole | For hollowing (chef's knife preferred) |
| Aluminum Foil 📄 | 1 sheet | For baking support |
The dough is everything here. Sourdough works best—its chewy texture holds up to hollowing and reheating. If you're not baking from scratch, Whole Foods or local bakeries often have perfect loaves. Look for one with a thick crust and dense crumb; it should feel sturdy but still soft to the touch. The 2-pound loaf size gives you enough material for four bowls. Pro tip: bake it a day ahead so it's fully dried out for cleaner hollowing.
No sourdough? Italian bread or a sturdy baguette works in a pinch. The olive oil isn't just for flavor—it creates that golden, crispy crust when broiled. Short on rosemary? Thyme or oregano adds similar earthy notes. The tomato soup can be any variety—store-bought works fine—but avoid watery ones. For extra flavor, stir in a spoonful of the minced garlic and chopped rosemary before filling. The Parmesan and basil are just for garnish, but they make the presentation pop—don't skip them if you're serving guests!
Store any leftover dough in an airtight container for 2 days or freeze for 3 months. Hollowed bowls can be prepped ahead and refrigerated (covered) for 24 hours before baking. Reheat filled bowls in the oven for 5-7 minutes at 375°F to crisp up the edges. I always make extras—these freeze beautifully and reheat like a dream for quick meals. The best part? Every bite is part of the experience!
Why You'll Love This Recipe
- No-Knead Magic: I swear by this dough—just mix, shape, and let it rise while you sip coffee. No standing at the counter, no fancy tools, just pure hands-off ease that still feels like you’re baking from scratch.
- Herb-Packed Crunch: That crispy rosemary-salt crust? It’s the star. The garlic-infused oil soaks in just enough to make every bite taste like a Mediterranean vacation, but not so much that it overpowers your filling.
- Filling Flexibility: Stuff it with chili, mac and cheese, or even a creamy soup—it’s the ultimate vessel. I’ve used it for game day, lazy Sundays, and even as a dramatic dessert bowl (yes, with ice cream).
- Leftovers? No Problem: The dough keeps 3 days in the fridge, and baked bowls reheat beautifully. Honestly, I make two just to have one ready for when I’m too tired to bake—no waste, all flavor.
Step-by-step instructions for artisan bread bowls
Transform your sourdough into edible soup bowls with this foolproof method.
Prepare the Sourdough Dough
Preheat your oven to 375°F and line a baking sheet with parchment paper. Shape the 2 lb sourdough dough into a round loaf about 8 inches in diameter. Place it seam-side down on the prepared baking sheet and let it rise at room temperature for 1-2 hours until it has nearly doubled in size and springs back slowly when gently pressed.
While the dough rises, brush the top generously with 2 tablespoons extra-virgin olive oil and sprinkle evenly with 1 teaspoon coarse sea salt. This creates a beautiful crust and enhances the flavor. The dough should be slightly puffy but still firm to the touch when ready to bake.
Bake the Sourdough Loaf
Bake the dough for 30-35 minutes until it's golden brown and sounds hollow when tapped on the bottom. Remove it from the oven and let it cool completely on a wire rack for at least 2 hours. This cooling step is crucial—it prevents the bread from falling apart when you hollow it out later.
Here's the thing—if you try to hollow a warm loaf, the structure will crumble. Patience here ensures your bread bowls hold their shape perfectly. While it cools, prepare your filling by mincing the 4 cloves garlic and chopping the 0.25 cup fresh rosemary finely for maximum flavor infusion.
Hollow the Bread Bowl
Using the sharp knife, carefully slice off the top of the cooled loaf to create a lid. I like to make this cut about 1 inch thick so it's easy to handle. Then, use a spoon to scoop out the interior, creating a hollow space about 2-3 inches deep. You want to leave about ½-inch thick walls all around—this ensures the bowl maintains its structure when filled.
Save both the top lid and the scooped-out bread pieces. The lid will become a cover for your soup, and the bread pieces can be toasted and used as garnish or croutons. Don't worry if it looks imperfect—the beauty of this method is its rustic charm.
Assemble and Bake the Bread Bowls
Preheat your oven to 350°F and line another baking sheet with aluminum foil for easy cleanup. Place your hollowed bread bowls on the prepared sheet. In a small bowl, combine the minced garlic, chopped rosemary, and 0.5 teaspoon cracked black peppercorns. Spoon this mixture into the bottom of each bread bowl.
Carefully pour 2 cups creamy tomato soup into each bowl, filling them about ¾ full. The soup should be hot but not boiling to prevent the bread from getting soggy. Place the bread bowl tops back on and bake for 10-12 minutes until the edges are golden and the soup is heated through.
Garnish and Serve
Remove the bread bowls from the oven and let them sit for 2-3 minutes to allow the steam to escape. Carefully remove the tops and sprinkle each bowl generously with 0.25 cup shredded parmesan cheese and 0.125 cup chopped fresh basil leaves. The cheese will melt slightly from the residual heat, creating a delicious topping.
Serve immediately while the soup is hot and the bread is still crispy. Each bite delivers warm, flavorful bread infused with rosemary and garlic, paired with creamy tomato soup. This method transforms a simple loaf into an interactive, delicious dining experience that's perfect for hearty meals or cozy gatherings.
Pro Tips For Making Artisan Bread Bowl
- PREFER THE COLD DOUGH: Take your sourdough straight from the fridge—no thawing. The chill keeps the shape tight when you hollow it out, so the bowl doesn’t collapse when you carve. I learned this the hard way after my first attempt turned into a sad, lopsided mess.
- SALT THE GARLIC: Toss your minced garlic in a pinch of coarse sea salt before mixing it into the olive oil. It keeps the garlic from burning while toasting and adds a deeper, nuttier flavor. (Yes, even if you’re impatient like me—just don’t skip the salt.)
- CARVE DEEPER THAN YOU THINK: When hollowing your bread bowl, go at least 1 inch thick—closer to 1.5 if you can. Thin walls will burn before the center cooks, leaving you with a crispy shell and raw dough. Trust me, your soup will thank you.
- ROAST THE HERBS FIRST: Lightly toast the rosemary sprigs in the oven (350°F for 5 minutes) before brushing the bowl with olive oil. The aroma intensifies, and the leaves crisp up beautifully when you drizzle the finished bowl. (It’s a small effort for a big flavor payoff.)
Storing and reheating this artisan bread bowl
Refrigerator Storage
Store your empty, hollowed bread bowls in an airtight container at room temperature for up to 2 days before filling. If you've already filled them with soup or salad, cover tightly with plastic wrap and refrigerate for no more than 24 hours—the bread will soften over time.
I like to keep a stack of empty bowls ready in my fridge for quick assembly when guests drop by unexpectedly. 💛
For longer storage, place filled bowls in a single layer on a tray lined with parchment paper. This prevents condensation from making the bread soggy. Label with the date—these stay fresh for 2 days when properly stored.
The key is keeping them covered but not sealed airtight to allow minimal moisture escape.
Freezer Prep
Prepped bread bowls freeze beautifully for up to 3 months—just assemble them (hollowed but unfilled) and wrap individually in plastic wrap, then place in a freezer bag with all air squeezed out.
When ready to use, thaw overnight in the fridge and reheat filled bowls in the oven for 10 minutes at 350°F. The texture stays crispy when reheated properly. ✨
For filled bowls, freeze them uncovered for 1 hour first to solidify the soup, then wrap tightly. When reheating, bake at 375°F for 12-15 minutes until the edges are crisp again. The garlic-rosemary infusion actually intensifies after freezing, making them even more flavorful.
Reheating Filled Bowls
My favorite method is oven reheating: place filled bowls on a baking sheet and heat at 350°F for 8-10 minutes with the lid on. This crisps the edges while gently warming the soup.
For microwave reheating, cover with a damp paper towel and heat in 30-second bursts, stirring between each interval until warmed through. The microwave method works best for quick lunches but won't give you that perfect crispy texture. 🔥
If your bread bowl feels too soft after reheating, broil for 1-2 minutes at the end to restore crispness. Just watch closely—broiling can happen fast! For extra crunch, sprinkle with a little coarse sea salt and olive oil before reheating. The salt helps draw out moisture for that golden crust.
Make-Ahead Tips
Prep all your bowls ahead of time by hollowing and storing the empty shells in the freezer. When ready to serve, simply fill with warm soup, cover with the lid, and reheat.
I often make two batches—one for immediate use and one frozen for future meals. This saves time on busy weeknights while still delivering restaurant-quality results. 💡
For soup fillings, prep your base sauce ahead and store it separately. Reheat just before assembling the bowls to maintain freshness. The garlic-rosemary mixture can also be prepped in advance and stored in the fridge for 3 days—just mix it fresh before spooning into the bowls for maximum flavor.
Nutrition facts
Frequently asked questions
What type of bread works best for artisan bread bowls?
Sourdough is ideal due to its chewy texture and sturdy structure, but Italian bread or baguettes also work well. The key is choosing a loaf with a thick crust and dense crumb—it should hold its shape when hollowed and reheated. Avoid soft breads like brioche, as they'll crumble when scooped.
How do I prevent my bread bowl from falling apart when hollowing?
Always let the bread cool completely before hollowing—warm bread crumbles easily. Leave ½-inch thick walls around the edges, and use a sharp knife for clean cuts. For extra stability, brush the inside with olive oil before adding fillings. If it feels too fragile, chill in the fridge for 15 minutes before serving.
Can I use this technique for salads instead of soup?
Bread bowls work beautifully with chilled salads like Greek or Caesar. Just skip the reheating step and assemble with cold fillings. For extra crunch, toast the hollowed bowls for 2-3 minutes at 375°F before filling. Avoid watery dressings—they can soften the bread faster.
What if I don't have a sourdough starter?
No problem! Use store-bought sourdough or whole wheat bread for added fiber. For a quicker option, try a focaccia loaf—its olive oil content makes it extra sturdy. Just ensure the bread is fully baked and cooled before hollowing. The texture will differ slightly, but the technique remains the same.
How do I make my bread bowl extra crispy?
Broil the filled bowls for 1-2 minutes at the end of reheating to restore crispness. Brush the edges with olive oil and sprinkle with coarse sea salt before broiling. For even more crunch, bake the empty bowls for 5 minutes at 375°F before adding fillings. The salt helps draw out moisture for that perfect golden crust.