
Side Dishes
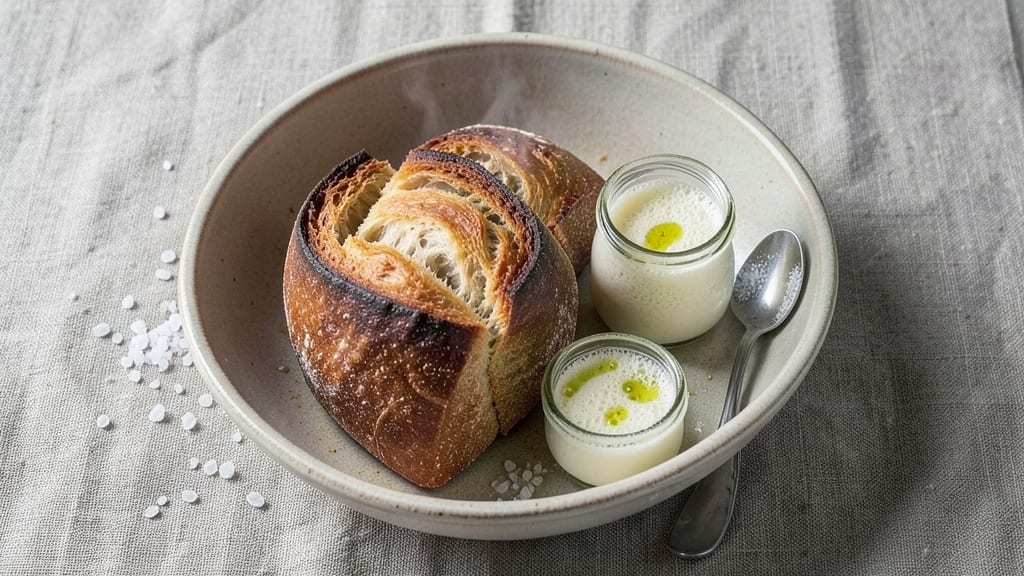
This artisan bread master recipe unlocks the secrets behind restaurant-quality crust and crumb at home. The key lies in precise dough hydration, controlled fermentation, and high-heat baking techniques that transform simple ingredients into bread with dramatic flavor and texture.
I've refined this method over years of testing, ensuring every batch delivers that coveted crispy crust and open, airy crumb.
What sets this recipe apart is the balance between traditional methods and modern convenience. You'll work with high-protein flour and proper yeast ratios for optimal gluten development, while still achieving results in a manageable timeframe.
The shaping and scoring techniques create those signature artisan bread characteristics that make store-bought loaves seem inferior. Each step builds on the previous one to create bread that's both impressive and reliable.
By following these exact techniques, you'll achieve bread with a crispy, caramelized crust that shatters satisfyingly and a tender, open crumb with just the right chew. The flavor development during fermentation creates complex notes that elevate any meal.
This isn't just bread—it's a skill you can master that will impress anyone who tastes it. Let's get started on creating your perfect loaf.
The beauty of this recipe lies in its versatility. You can adapt it for different shapes, sizes, and even flavor variations while maintaining that signature artisan quality.
Whether you're baking for a family dinner, preparing for a special occasion, or simply treating yourself to homemade bread, this method delivers consistent, professional results. The techniques you'll learn here form the foundation for creating any type of artisan bread you desire.
Ingredients for artisan bread master
Nine essential ingredients transform simple flour into restaurant-quality artisan bread.
| Ingredient | Amount | Notes |
|---|---|---|
| High-Protein Bread Flour 🌾 | 4 cups | 13-14% protein for optimal gluten |
| Active Dry Yeast 🍞 | ¼ oz | Or 2 1/4 tsp (1 packet) |
| Granulated Sugar 🍚 | ½ tsp | Feeds yeast for fermentation |
| Diamond Crystal Kosher Salt 🧂 | 2 tsp | Fine grain preferred |
| Extra-Virgin Olive Oil 🫒 | 1 ½ tbsp | High-quality for flavor |
| Warm Water 💧 | 1 ½ cups | 105-110°F for yeast activation |
| Cornmeal 🌽 | ¼ cup | For dusting baking sheet |
| Ice Water ❄️ | ½ cup | For final dough adjustment |
| Semolina Flour 🌾 | ⅛ cup | For dusting shaped dough |
The flour is non-negotiable here—King Arthur or Caputo high-protein bread flour gives that perfect chew and open crumb. I always grab mine from King Arthur's website or my local specialty grocery store's bulk section. The yeast? Fresh is best, but active dry works if stored properly. Test it first: drop a pinch in warm water with sugar—if it bubbles in 5-10 minutes, it's good to go. For the salt, Diamond Crystal dissolves better than table salt and enhances flavor without bitterness. The olive oil adds richness, so avoid cheap brands—look for 'extra-virgin' on the label and store it in a cool, dark place.
No high-protein flour? All-purpose plus 1 tbsp vital wheat gluten per cup gets you close. Running out of yeast? Instant yeast works 1:1, but active dry needs a 10-minute proof in water first. The cornmeal can be swapped for rice flour if you're out, though it won't crisp as nicely. For the scoring, a single-edge razor blade gives the cleanest cuts, but a sharp serrated knife works in a pinch. Pro tip: Chill your dough 30 minutes before scoring—it'll hold its shape better and give you those dramatic crust lines. The ice water might seem odd, but it's key for controlling gluten development in the final mix.
Store your flour in the freezer to prevent rancidity—it keeps for up to a year this way. Yeast lasts 3 months in the fridge, but if it's been sitting out, test it as mentioned above. The shaped dough can wait up to 24 hours in the fridge before baking, which is perfect for overnight prep. Once baked, let the bread cool completely on a wire rack—cutting it warm makes it gummy. For leftovers, wrap tightly in a cotton towel and store at room temp for 2-3 days. Freeze slices for up to 3 months—toast straight from frozen for crispy results.
Why You'll Love This Recipe
- No-Knead, No-Stress Start: I swear by this—just mix, let it rest, and bake. The high-protein flour does all the heavy lifting while you sip coffee, and the yeast’s slow rise means zero elbow grease. Honestly, I’ve made this on lazy Sundays when I couldn’t be bothered to turn on music.
- Crust So Good: That olive oil crust? Chef’s kiss. The kosher salt and sugar combo creates this perfect balance of caramelized crunch and buttery softness inside—like a hug for your sandwich or soup. Between us, it’s the reason I stopped buying store bread.
- Weeknight Workhorse: Toss a slice in a panini press with leftover chicken, or tear it into croutons for salads. It’s my go-to for charcuterie boards, garlic butter dips, or even a quick toast with jam when I’m in a hurry. (Yes, even on a Tuesday night.)
- Budget-Friendly Staple: A single batch stretches into breakfast toast, dinner rolls, and sandwiches for days—no waste, just flavor. The ingredients are cheap, but the results feel fancy. I’ll be real: my grocery bill didn’t budge, but my fridge sure did.
Step-by-step instructions for artisan bread master recipe
Let's create bread with a crackly crust and an open, airy crumb—no shortcuts, just perfect technique.
Activate the Yeast for Maximum Rise
In a small bowl, combine the 0.25 oz active dry yeast, 0.5 tsp granulated sugar, and 1 cup of the 1.5 cups warm water (should feel like bathwater, 105-110°F). Let it sit for 5-10 minutes until it becomes foamy and bubbly—this means your yeast is alive and ready to work. If it doesn't bubble, your yeast may be dead, and you'll need to start over.
This activation step ensures your dough gets a strong, consistent rise. I like to use a glass bowl so I can easily see the bubbles forming. Once it's active, add the remaining 0.5 cup warm water to the bowl and set it aside while you prepare the rest of your ingredients.
Mix the Dough with High-Protein Flour
In the bowl of a stand mixer fitted with the dough hook, combine the 4 cups high-protein bread flour and 2 tsp diamond crystal kosher salt. Mix on low speed for 30 seconds to distribute the salt evenly through the flour. This prevents any single spot from becoming overly salty.
With the mixer running on low, gradually add the 1.5 tbsp extra-virgin olive oil and the yeast mixture. Let the dough come together for 2-3 minutes before increasing the speed to medium. This gradual approach helps the gluten develop properly without tearing the dough too early.
Knead Until Gluten Forms Elastic Windows
Knead the dough on medium speed for 5-7 minutes until it becomes smooth and elastic. You'll know it's ready when you can poke it gently and the indentation springs back slowly, or when you stretch a small piece and it forms a thin, translucent membrane with tiny windows—this is the gluten network at work.
If the dough feels sticky, don't add more flour—just keep kneading. The gluten needs time to develop fully. I like to check the dough's temperature after kneading; it should be between 75-80°F. If it's too warm, let it rest for 10 minutes before shaping.
Bulk Ferment for Optimal Flavor Development
Shape the dough into a loose ball and place it in a lightly oiled bowl. Cover with a damp towel and let it ferment at room temperature for 1-2 hours, or until it has roughly doubled in size. This bulk fermentation step is where the magic happens—flavors develop, gluten relaxes, and the dough becomes more manageable.
I like to do two sets of folds during this time: after 30 minutes and again after 1 hour. To fold, wet your hands, grab one side of the dough, stretch it upward, and fold it over itself. Rotate the bowl and repeat—this builds strength without overworking the dough.
Shape and Final Proof for Perfect Crust
Turn the dough onto a lightly floured surface and shape it into a tight boule or batard. For a boule, gather the edges toward the center and tuck them under. For a batard, roll it into a log shape. Dust the dough with 0.125 cup semolina flour to prevent sticking, then place it seam-side up on a baking sheet dusted with 0.25 cup cornmeal. Cover and let it proof for 1-2 hours until it has risen about 50%.
For the final proof, I like to place the dough in the fridge overnight for 8-12 hours. This slow fermentation creates deeper flavors and a more open crumb. When ready to bake, preheat your oven to 450°F with a Dutch oven inside for 45 minutes. This ensures your bread gets that perfect oven spring and crispy crust.
Pro Tips For Making Artisan Bread Master
- Bloom the Yeast Properly: Mix the yeast with warm water (105–110°F) and sugar first, then let it sit for 5–10 minutes until frothy—this confirms it’s active and saves you from a flat loaf later. I learned this the hard way after baking a dense brick once because the yeast was old.
- Salt the Dough Early: Add the Diamond Crystal kosher salt to the flour before mixing—it dissolves better and distributes evenly, preventing uneven flavor or crust saltiness. (Yes, even if you’re impatient like me.)
- Avoid Over-Kneading: Stop when the dough springs back slowly after poking it—overworking high-protein flour makes it tough and chewy. My grandmother swore by this, and she was right: less effort, better texture.
- Use Olive Oil for Laminating: Brush the dough with extra-virgin olive oil before shaping—it creates a silky crust and keeps the crumb tender. Skip the butter here; it burns too easily in the oven. (Your future self will thank you.)
Wine and beer pairings for artisan bread master
Crisp White Wine
Artisan bread's crispy crust and airy crumb pair beautifully with dry white wines that have enough acidity to complement the caramelized notes. I love Sauvignon Blanc from New Zealand—its zesty citrus and herbal notes cut through the bread's richness while enhancing its toasted flavors.
A Chablis from Burgundy is another fantastic choice, with its bright minerality and crisp finish that mirrors the bread's crusty texture. 🍷
Light Red Options
For those who prefer red, go for light-bodied wines with subtle fruit flavors. A Pinot Noir from Oregon or Burgundy works perfectly—its red berry notes and silky tannins won't overpower the bread's delicate crumb. Avoid bold reds like Cabernet Sauvignon, as their heavy tannins clash with the bread's delicate structure.
I often reach for a Gamay from Beaujolais for its juicy, low-tannin profile that pairs wonderfully with the bread's crust.
Beer Pairings
Craft saisons or Belgian ales are my go-to beer pairings for artisan bread. The yeasty, spicy notes in a Flanders Red or Witbier complement the bread's fermented flavors beautifully. For a lighter option, try a German Pilsner—its crisp, clean finish balances the bread's richness without competing.
Avoid heavy stouts or IPAs, as their bold flavors can overpower the bread's delicate nuances. 🍺
Seasonal Adaptations
In summer, I reach for crisp Rosé or dry Riesling—their refreshing acidity pairs perfectly with the bread's crispy crust. For winter, a dry sparkling wine like Champagne adds a festive touch, while its bubbles cleanse the palate between bites.
If you're serving the bread with charcuterie, a dry cider from Normandy adds a rustic charm that complements both the bread and cured meats.
Beverage Temperature
Serve your wine or beer slightly chilled—around 45-50°F for whites and rosés, and 50-55°F for lighter reds and beers. Cold beverages help balance the bread's warmth, enhancing both the crust's crispness and the crumb's tenderness.
I like to pour my wine into Riedel or Schott Zwiesel glasses—their unique shapes help concentrate the aromas and flavors, making each sip (and bite) even more enjoyable.
Nutrition facts
Frequently asked questions
Can I substitute bread flour with all-purpose flour?
The recipe calls for high-protein bread flour to develop that signature artisan chew and open crumb. For a 1:1 substitution, mix 1 cup all-purpose flour with 1 tbsp vital wheat gluten per cup. This boosts the protein content to mimic bread flour's structure. The gluten network is crucial for trapping gas during fermentation, so don't skip this step if you want that professional texture.
How do I know when the dough is properly kneaded?
Your dough is ready when it passes the windowpane test: stretch a small piece until it's thin enough to see light through it without tearing. The surface should be smooth and elastic, with no cracks. Another test is the finger indent—press your finger gently into the dough; if it springs back slowly, it's developed enough. Over-kneading can make the dough tough, so aim for 5-7 minutes in a stand mixer.
What's the best way to store leftover artisan bread?
Wrap cooled bread tightly in a cotton towel or beeswax wrap to maintain moisture and prevent staling. Store at room temperature for 2-3 days. For longer storage, freeze slices wrapped in parchment paper for up to 3 months. To revive, toast straight from frozen for 3-5 minutes at 375°F until crispy. Never store in plastic bags—it traps moisture and makes bread gummy.
Why did my bread turn out dense instead of airy?
Dense bread usually results from underdeveloped gluten or overproofing. Check your kneading time—if you didn't reach the windowpane test, knead longer. Overproofing happens when dough rises too long before baking; it should be 50% larger after final proof. Also verify your yeast was active (it should bubble in 5-10 minutes) and your oven was properly preheated with the Dutch oven inside for 45 minutes before adding bread.
Can I make this recipe without a stand mixer?
Mix the dough by hand in a large bowl, then knead on a floured surface for 10-12 minutes until smooth and elastic. Work the dough vigorously to develop gluten—press, fold, and turn it repeatedly. The key is patience; hand-kneaded dough takes longer but achieves the same results. For bulk fermentation, use the same timing and folding technique as described.