
Side Dishes
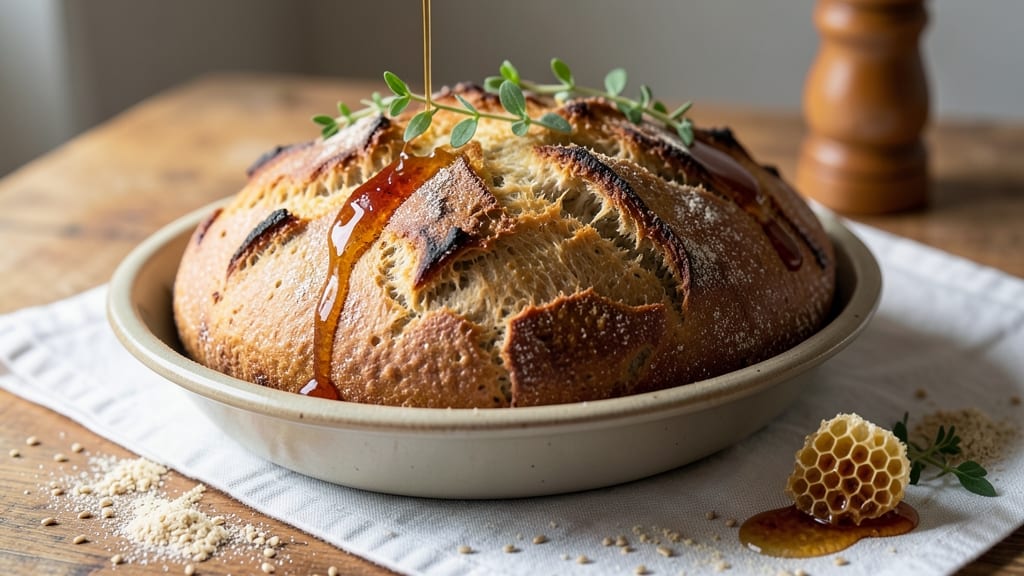
This Alpine grain bread recipe brings rustic charm to your table with its signature crisp crust and nutty-sweet interior—perfect for sandwiches or dipping in olive oil. 🌟 The secret lies in traditional Alpine grains like spelt or rye, which add depth and texture without overpowering the bread's natural flavor.
I've refined this recipe over years to ensure it works in home ovens, delivering that satisfying crunch and chewy center every time.
The dough starts with a simple mix of flour, water, and a touch of honey, but the magic happens during the long fermentation. This slow rise develops complex flavors and creates that signature open crumb structure.
Kneading by hand ensures proper gluten development, while shaping the loaf gives it that classic rustic form. Baking at high heat creates the crisp crust you crave, while steam inside keeps the crumb tender.
What makes this bread truly special is its adaptability—add seeds or herbs for extra texture, or a drizzle of honey for subtle sweetness. The nutty grain flavors shine through, making each slice uniquely satisfying.
Whether you're serving it with soups or pairing it with charcuterie, this bread elevates any meal. Let's get started on baking your own loaf.
For best results, use a mix of Alpine grains like spelt or rye, which contribute to the bread's distinct character. The recipe is designed to be foolproof, even for beginners, with clear steps for shaping and baking.
Once you try this bread, you'll understand why it's a staple in Alpine kitchens—and why it deserves a place in yours.
Ingredients for alpine grain bread
Simple Alpine grains and a few pantry staples create rustic bread with crisp crust and nutty flavor.
| Ingredient | Amount | Notes |
|---|---|---|
| Spelt Flour 🌾 | 2 cups | Stone-ground for best texture |
| All-Purpose Flour 🌾 | 1 ½ cups | For structure and rise |
| Rye Flour 🌾 | ½ cup | Dark rye for depth of flavor |
| Active Dry Yeast 🍞 | ¼ oz | Or 2 1/4 tsp (7g) |
| Honey 🍯 | ¼ cup | Wildflower preferred |
| Warm Water 💧 | 1 ¼ cups | 105-110°F for activation |
| Kosher Salt 🧂 | 1 ½ tsp | Diamond Crystal preferred |
| Sunflower Seeds 🌻 | ¼ cup | Toasted for crunch |
| Sesame Seeds 🌿 | 2 tbsp | Optional for extra flavor |
| Cornmeal 🌽 | 2 tbsp | For dusting baking sheet |
| Ice Cubes ❄️ | ½ cup | For dough shaping |
The grains are the heart of this bread. King Arthur or Bob's Red Mill spelt flour gives the best texture—avoid the cheap stuff. For rye, Hodgson Mill or Trader Joe's have great options. I always toast my seeds (sunflower and sesame) in a dry pan for 3-4 minutes—they add so much more flavor when they're warm. The honey should be raw if possible, but any good quality will work. Yeast is non-negotiable here; if it's old, your bread won't rise properly. Test it by dropping a pinch in warm water—it should foam within 5 minutes.
No spelt flour? Whole wheat or whole grain flour works in a pinch, but the texture will be denser. Honey too expensive? Maple syrup or agave at the same amount, though the flavor will differ slightly. Running out of seeds? Poppy seeds or flaxseeds add a nice crunch too. For the water, tap is fine, but if yours is heavily chlorinated, let it sit out for 10 minutes first. The ice cubes might seem odd, but they're essential for keeping the dough cool while shaping—especially important if your kitchen gets warm. And if you're baking in a dry climate, consider adding 1 tbsp olive oil to the dough for extra tenderness.
This dough needs time—at least 2 hours of rising, longer if you can manage it. Store it in the fridge overnight for even more flavor. The shaped loaf keeps well wrapped in a cool, dark place for 3 days, or freeze for up to 3 months. I like to slice it fresh before serving—those seeds stay crisp that way. For extra crunch, brush the cooled loaf with melted butter and sprinkle with flaky salt. Leftovers? Toast them or make croutons—they're even better the second day.
Why You'll Love This Recipe
- No-Knead Magic: I swear by this—just mix, let it rise, and bake. The spelt and rye blend does all the heavy lifting while I sip coffee. No stand mixer, no fuss, just golden crust magic.
- Honeyed Depth: That honey isn’t just sweet—it caramelizes into a subtle, rich undertone that makes every bite taste like a cozy mountain hut. The rye adds a chewy bite, so it’s never boring.
- Lunchbox Hero: Between us, this bread is my go-to for sandwiches, toast, or even charcuterie boards. Slice it thick, freeze half, and you’ve got breakfast covered for days. My kids fight over the leftovers.
- Budget Crust: Spelt and rye might sound fancy, but they’re cheaper than buying artisanal bread at the store. A single batch stretches to feed my family for three days—no waste, just satisfaction.
Step-by-step instructions for Alpine grain bread
Here's how to craft a rustic loaf with a crispy crust and nutty-sweet interior.
👨🍳 Step 1: Activate the Yeast and Mix the Dough
In a large bowl, combine the 1.25 cups warm water (tested at 105-110°F) with the 0.25 cup honey and 0.25 oz active dry yeast. Let it sit for 5-10 minutes until foamy—this confirms your yeast is alive. If nothing happens after 10 minutes, start fresh with new yeast.
In a separate bowl, whisk together the 2 cups spelt flour, 1.5 cups all-purpose flour, and 0.5 cup rye flour. Add the yeast mixture, 1.5 tsp kosher salt, and mix with a wooden spoon until a shaggy dough forms. The rye flour will add depth, while the spelt gives that signature Alpine texture.
🥘 Step 2: Knead and Develop Gluten
Turn the dough onto a lightly floured surface and knead for 8-10 minutes until smooth and elastic. You'll know it's ready when it springs back slowly when poked. I like to use a bench scraper to cut and fold the dough—it helps develop gluten without overworking it.
Real talk: If the dough feels sticky, add flour 1 tablespoon at a time until it holds together. Too much flour makes for a dense loaf, so aim for just enough to make it manageable. Once kneaded, place the dough in a lightly oiled bowl, cover with a damp towel, and let it rise in a warm spot for 1-2 hours or until doubled in size.
🔥 Step 3: Shape and Cold Proof
Punch down the risen dough and turn it onto a floured surface. Divide it into 4 equal portions (about 1 cup each) and shape into rounds. Here's where the ice cubes come in: Roll each round in the 0.5 cup ice cubes to chill the surface slightly—this helps create that crispy Alpine crust later.
Place the shaped dough on a baking sheet dusted with 2 tbsp cornmeal (this prevents sticking and adds texture). Cover with a damp towel and refrigerate for 12-24 hours. Cold proofing intensifies the flavors and makes the final loaf more manageable to handle.
🔥 Step 4: Bake for Crusty Perfection
Preheat your oven to 425°F with a baking stone or inverted baking sheet on the middle rack. Sprinkle the chilled dough rounds with 0.25 cup sunflower seeds and 2 tbsp sesame seeds for extra crunch and flavor. Bake for 25-30 minutes until the crust is deep golden brown and sounds hollow when tapped.
For that classic Alpine crust, I like to spray the loaves with water right before baking. The steam creates a crackly, crispy exterior that contrasts beautifully with the tender interior. Let the bread cool on a wire rack for at least 30 minutes before slicing—this ensures clean cuts and prevents a gummy texture.
Pro Tips For Making Alpine Grain Bread
- Mix the Rye Last: Rye flour absorbs water like a sponge and can turn your dough into a sticky mess. Hold off adding it until the spelt and all-purpose flours have already soaked up their share of hydration—then fold it in gently. This keeps the dough manageable without sacrificing that deep, earthy flavor.
- Proof in a Cool Spot: Alpine bread’s dense texture comes from a slow, controlled rise. After the first bulk fermentation, move the dough to the fridge for 12–16 hours. The cold slows yeast activity, letting flavors meld without overproofing—no more collapsing loaves or yeasty aftertaste.
- Honey Before Yeast: That honey isn’t just for sweetness—it feeds the yeast. Mix it with the warm water first, let it sit for 5 minutes until it’s lukewarm (not hot), then add the yeast. This jumpstarts fermentation faster and prevents sluggish dough, especially in cooler kitchens.
- Score Deep and Fast: The rye and spelt combo makes this bread dense, so a shallow slash won’t crack it open. Use a razor or sharp lame to cut a ½-inch-deep cross right before baking—this ensures a proper oven spring and prevents a sad, compact loaf. (Yes, it looks dramatic, but it works.)
Pro cooking tips for great alpine grain bread
Yeast Activation Test
Always test your yeast before mixing—drop a pinch into 105-110°F water with 1 tsp sugar. It should foam within 5 minutes. If not, your yeast is dead and needs replacing. I’ve ruined doughs using old yeast, so never skip this step! 🔥
Kneading Like a Pro
Use a bench scraper instead of a rolling pin to cut and fold dough—it develops gluten faster without overworking. Knead until the dough springs back when poked (8-10 minutes).
If it sticks, add flour 1 tbsp at a time—too much ruins texture. I swear by this method for perfect elasticity.
Cold Proofing Secrets
Refrigerate dough for 12-24 hours before baking—this deepens flavor and tightens gluten. Place dough in an airtight container with a damp towel to prevent drying. Pro tip: Use a digital thermometer to check dough temp before shaping—it should be 68-72°F for ideal fermentation.
Steam for Crispy Crust
Spray dough with water right before baking—the steam mimics a bread oven’s crackly crust. Use a baking stone preheated to 425°F for even heat distribution. For extra crispiness, bake on the bottom rack for the first 5 minutes before moving to the middle.
Seed Toasting Trick
Toast seeds in a dry pan for 3-4 minutes until fragrant—they add crunch and flavor. Sprinkle sunflower and sesame seeds immediately before baking so they stick. For extra flair, mix in 1 tsp poppy seeds or flaxseeds for a nutty twist.
Cooling for Clean Slices
Let bread cool on a wire rack for 30+ minutes—this prevents gummy slices. For crispier bread, store in a paper bag at room temp for 2 days. Freeze slices for up to 3 months**—toast directly from frozen for freshness.
Nutrition facts
Frequently asked questions
What makes Alpine grain bread different from regular bread?
Alpine grain bread stands out thanks to its mix of traditional Alpine grains like spelt and rye, which give it a distinct nutty-sweet flavor and chewy texture. The long fermentation process (including cold proofing) creates a deeper taste and open crumb structure. Plus, the crisp crust sets it apart from softer sandwich breads.
Can I skip the cold proofing step?
You can, but your bread will lack the rich, developed flavor that comes from 12-24 hours of cold fermentation. The cold proofing tightens gluten and enhances the grain flavors. If you're short on time, try a 2-hour room-temperature rise instead—just expect a slightly less complex taste.
Why does my dough feel too sticky?
Sticky dough is normal with whole grains, but you can adjust it. Add flour 1 tablespoon at a time until the dough holds together without sticking to your fingers. Too much flour makes for a dense loaf, so aim for just enough to make it manageable. A lightly floured surface helps too—don’t over-flour during kneading.
How do I know when the bread is fully baked?
Your bread is done when the crust is deep golden brown and sounds hollow when tapped on the bottom. For extra certainty, use an instant-read thermometer—it should read 190-200°F in the center. Let it cool for 30 minutes before slicing to avoid a gummy texture.
Can I add other grains or seeds?
Swap in einkorn, barley, or kamut flour for different textures, or boost seeds with chia, pumpkin, or flaxseeds. Just reduce all-purpose flour by the same amount to keep the dough balanced. Toast seeds first for maximum flavor—sprinkle them on the dough right before baking so they stick.